
Instructions, Tips, and Tricks for the Process and Installation of Yurt-Life
The first step, after choosing your site and obtaining any necessary permits, is to build your deck. We provide deck plans for each yurt size that are 'permit-ready,' as well as a concrete foundation option. Download and print our deck plans here:
Glance through our gallery of deck-building shots.
Platform Construction
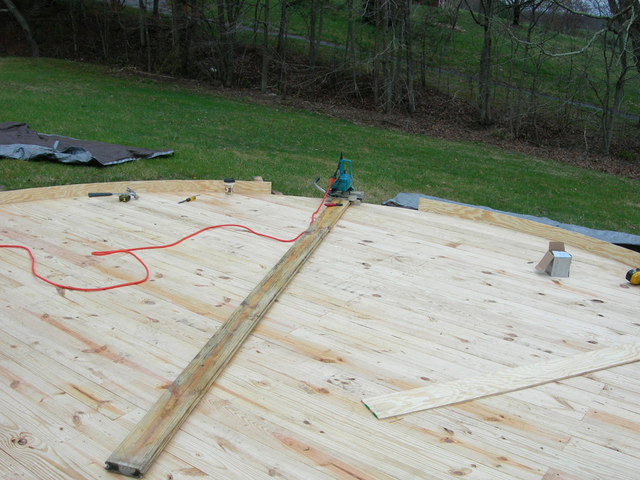
Take note that adding a finished floor to your yurt is an easier (though not necessary) process when done prior to the yurt going up (far fewer detailed cuts). Doing so requires close weather-watching and pre-planning so that your yurt can go up immediately after your floor. Otherwise, the floor needs to be well-protected from the weather until it does.
Also, having a super-insulated floor is a great idea, and will help you get a higher overall R-value from your yurt. Many of our yurt customers choose to do this with SIPS panels (Super Insulated Panels). Some SIPS Tips here:
-All of the SIPS need to be splined together with OSB spline on the long edges and 2''x4'' on the short. -It is highly recommended to buy a foam scoop- which is a bend electrical heating element similar to a stove. The scoop. lets you carve out the foam so that the 2x4's can be inserted. The scoop costs ~ $135 and can be found online from a company that makes branding irons.
-To cut the curves, one option is to use a Prazi saw, which attaches to a circular saw. It costs ~$150. To make the cuts, support the whole panel at the edge, and then scribe it with a rigid compass, made by fastening a 16' piece of wood to the center of the platform with a hole drilled in it for a pencil. Take the panel and put it on saw horses to cut. (To avoid getting the foam from the SIP everywhere, you can use a shop vac right next to the running blade). Spray the blade after every 2' of cutting with silicone lube.
-the SIPS are fastened down with 6.5'' coated self-drilling screws, available on Amazon. Fasten the panels every 2' into the beams and joists. -----The floor is dead solid and suitable for a hardwood floor atop.
-The edges of the SIPS running around the platform can be blocked with a 2x4 cut at around 23'' with a 6-degree miter. This seals them up and provides a good nailing surface for the edge board.
-Where the SIPSjoin and are splined, use 1''screws every 6''
-The bottoms of the SIPS can be painted to protect from weather.
Erecting your yurt can be a fun process completed in a day with friends, focus, and fair weather. Follow these instructions carefully, and in sequential order.
Have a look at some installation photos here:
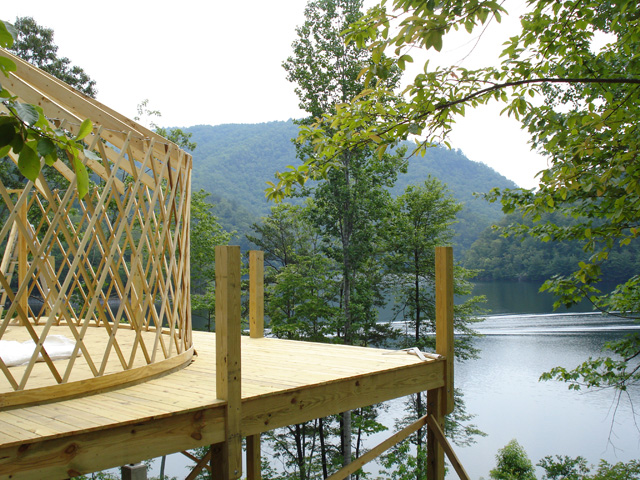
For a starting rate of $500 (prices vary based on size, windows, etc) our crew can direct and oversee setting the yurt up with helpers (skilled or unskilled) you provide. We can also coordinate a crew for hands-off, turnkey installation. Most yurts are up and under cover in a day.
Our base delivery rate starts at $1.25/mile, plus per diem depending on distance.Please email info@blueridgeyurts.com or call 540-745-7458 for specifics